
Set Up Dojo Workspace: From Install to First Conversation
Get Dojo Workspace running in three steps and usually under a minute, with deeper provider, model, project, access, and voice options available when you need them.
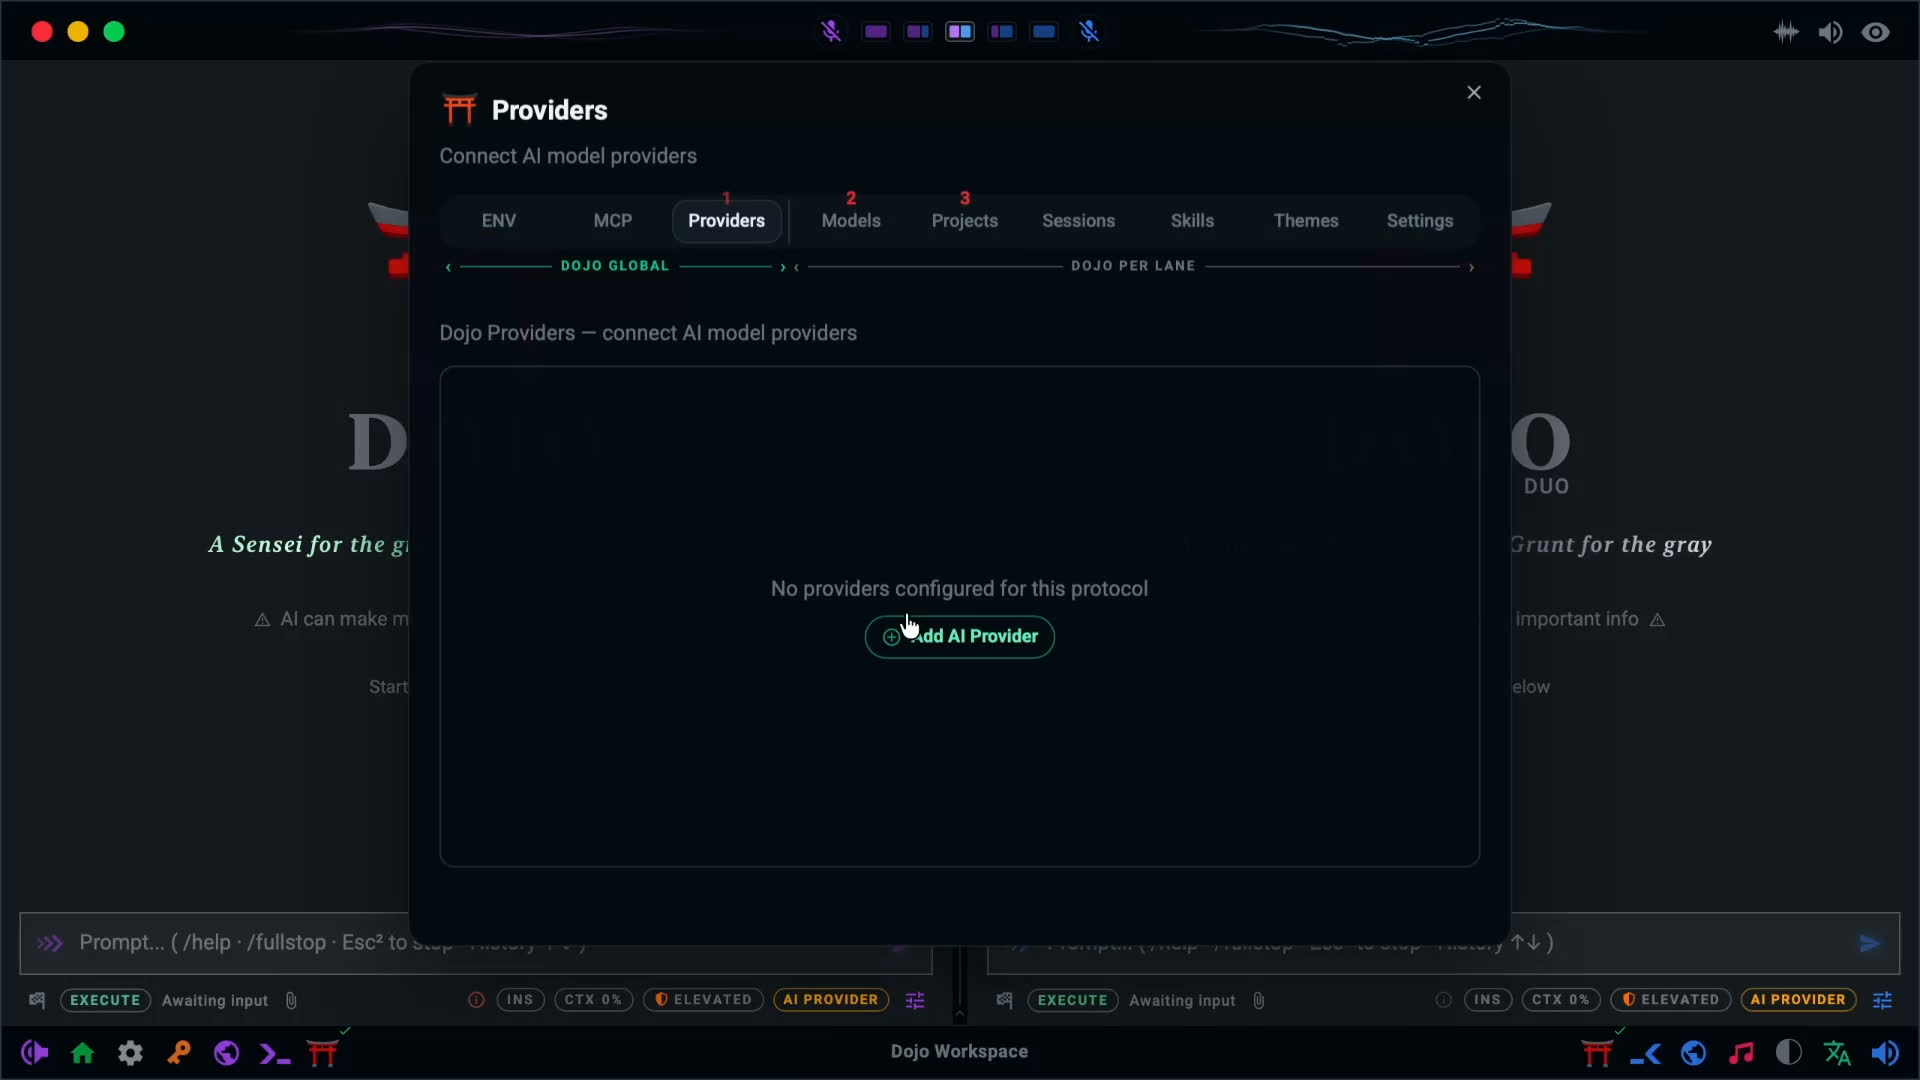
Dojo is simple to get started. In three steps—and usually within a minute—you can be up and running:
- Connect a provider
- Choose a model
- Add a project and launch
That is all most people need. Advanced users still have deeper options for providers, models, project access, local or cloud services, voice, and custom connections whenever the work calls for them.
The complete walkthrough is directly below. Watch it first if you prefer to see the setup end to end, then use the written sections as a reference for each decision.
Before you begin
For the currently documented macOS installation, you need macOS 11 or later, an Apple Silicon or 64-bit Intel Mac, at least 8 GB of memory, roughly 2 GB of available storage, and an internet connection when using cloud providers. A microphone is optional; it is only needed when you want to speak to Dojo.
You will also need one of the following:
- an account with a supported AI provider
- an API key from a supported provider
- a compatible custom or local provider endpoint
You do not need to configure every provider. One working provider, one model, and one project are enough to begin.
Install and open Dojo Workspace
Open the Dojo Workspace disk image, drag the application into the Applications folder, and eject the installer. Launch Dojo Workspace from Applications.
If macOS blocks the first launch because the app was downloaded outside the App Store, open System Settings → Privacy & Security, find the Dojo Workspace notice, and choose Open Anyway. Confirm the launch when macOS asks.
On first interaction, Dojo presents its agreement and links to the related privacy and license documents. Review them, then choose Agree & Continue. You return to the welcome page, where Enter Dojo opens the working interface.
The first active lane is Dojo Solo. A second lane may be available depending on the account and license, but it is not required for setup.
Read the setup signals
Inside Dojo, the control surface organizes first-run setup in a deliberate order:
- Providers
- Models
- Projects
The markers show what is missing and which step should come next. A missing step is highlighted; a configured but inactive choice uses an intermediate state; an active choice is confirmed.
This is guidance rather than a rigid wizard. You can revisit any section later, change models, switch projects, add another provider, or adjust access without reinstalling Dojo.
For the cleanest first run, follow the order shown: connect a provider, confirm a model, then add a project.
Step 1: Add an AI provider
Open the Providers section in Dojo’s control dialog. If no provider is configured, the panel shows Add AI Provider.
Select it to open the provider connection dialog.
A provider is the service that supplies the AI model Dojo will use. Dojo is the workspace, mentor, tool layer, and orchestration experience; the provider supplies the underlying model intelligence.
You only need one provider to start. Additional providers can be added later when you want different models, independent perspectives, or separate capabilities.
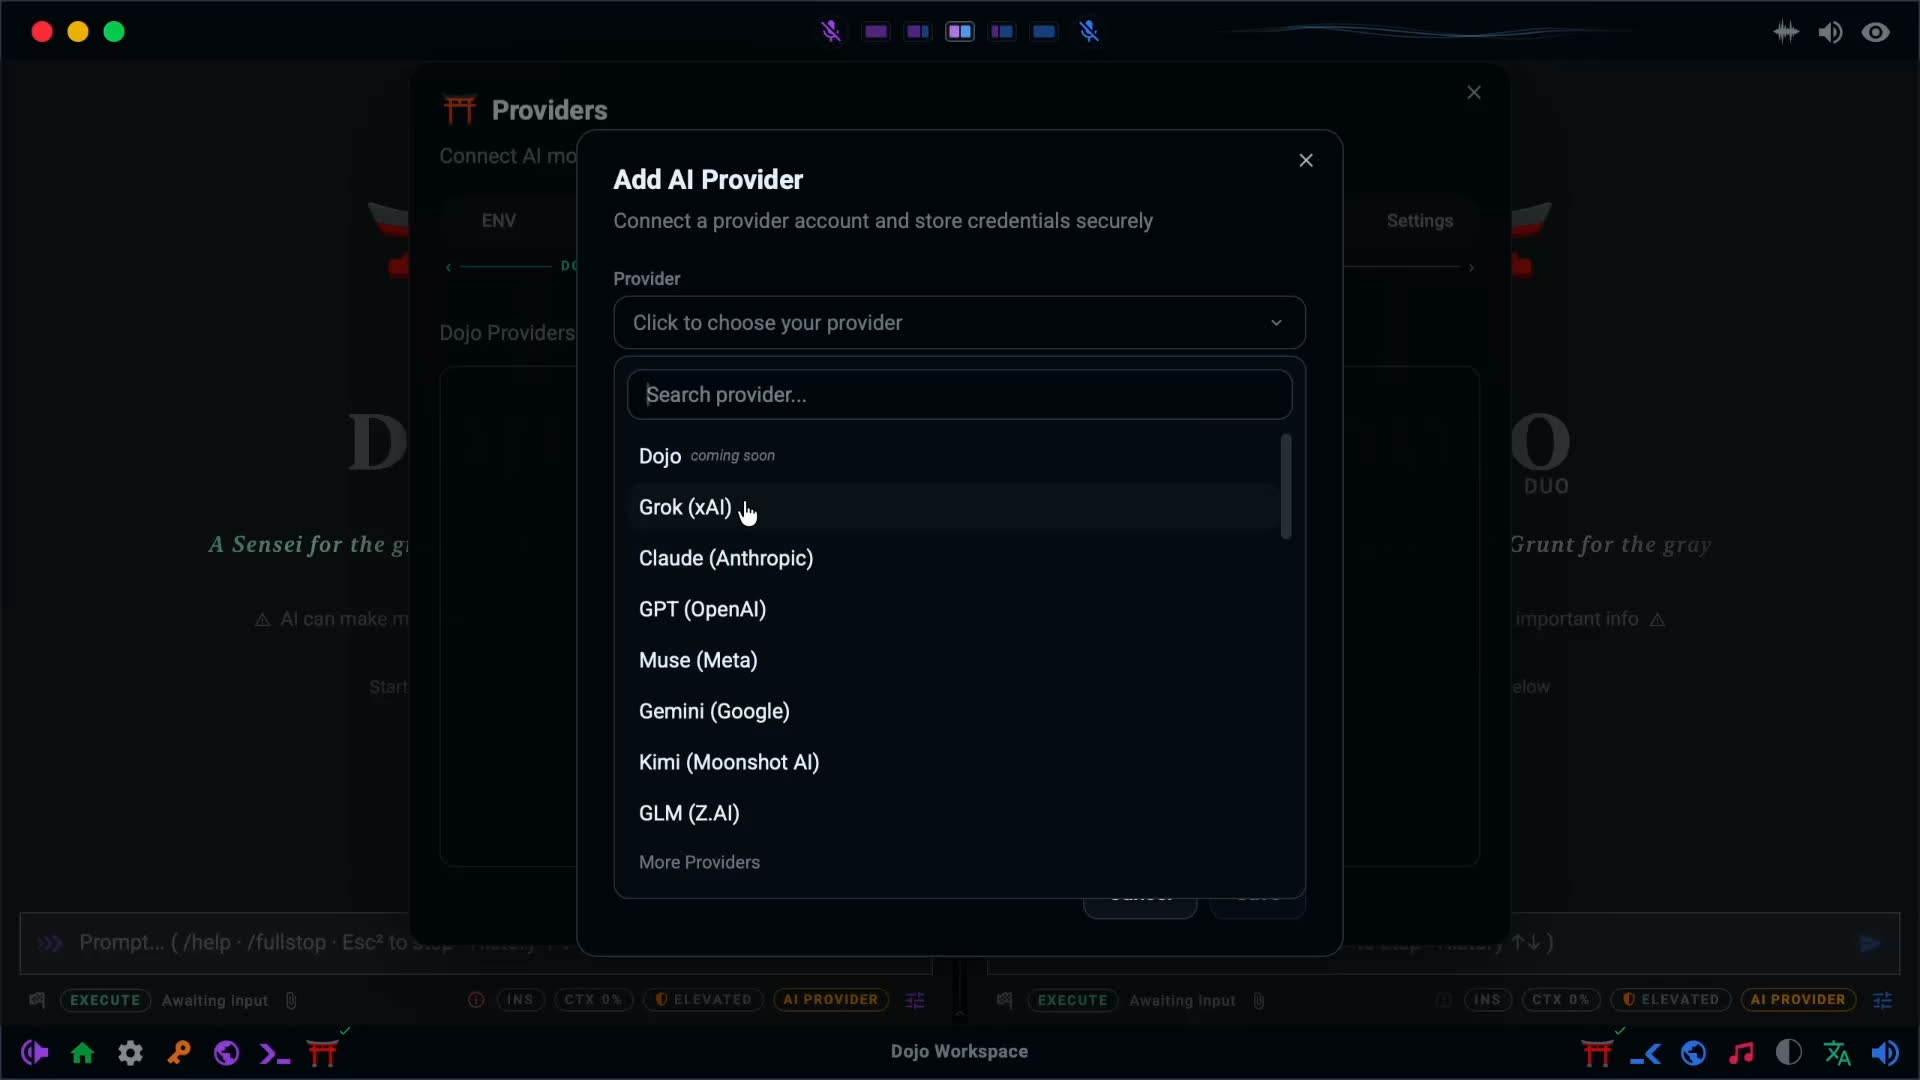
Step 2: Choose a supported provider
Open the provider selector to see the supported choices. The exact list can evolve as services and integrations change. The current interface may include options such as:
- Grok from xAI
- Claude from Anthropic
- GPT from OpenAI
- Muse from Meta
- Gemini from Google
- Kimi from Moonshot AI
- GLM from Z.AI
- additional compatible providers and endpoints
Choose the provider connected to the account or API access you want to use. In this walkthrough, Grok (xAI) is the example.
Dojo does not force one provider on every user. The best starting choice is usually the provider you already trust, understand, and have permission to use.
Step 3: Connect through your account or an API key
After choosing a provider, select the connection method supported by that provider.
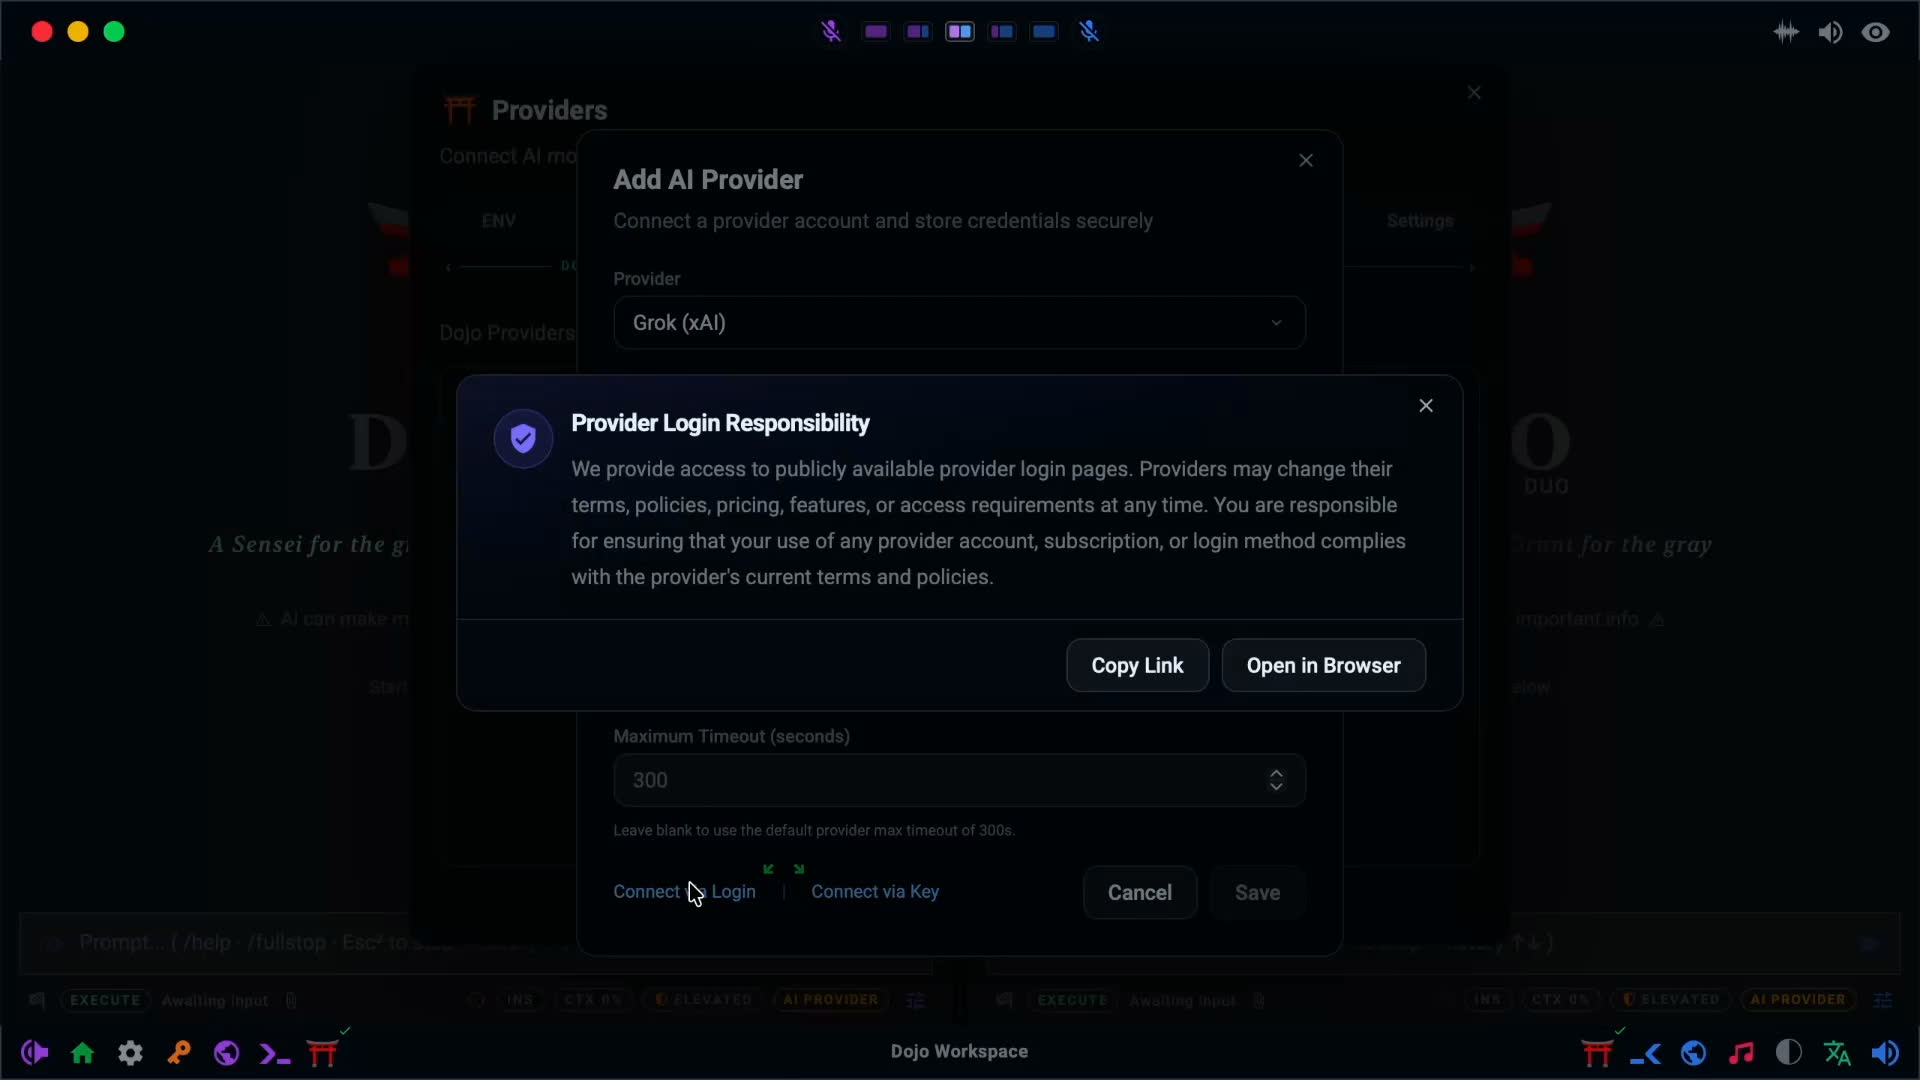
Connect through your account
Choose Connect via Login when you want to authenticate through the provider’s public account flow. Dojo explains that the provider controls its own login page, terms, pricing, features, subscriptions, and access requirements.
Choose Open in Browser to continue through the provider’s sign-in page. A Copy Link option is available when you need to open the address separately.
Complete the provider’s login, approve the connection when appropriate, and return to Dojo.
Connect with an API key
Choose Connect via Key when you already have an API key from the provider. Paste the key into the masked credential field and save the provider.
Treat API keys like passwords:
- obtain them directly from the provider
- do not paste them into chat messages
- do not store them in project source files
- do not commit them to version control
- rotate them through the provider if they are exposed
Some compatible local endpoints may not require a key. Custom provider connections may also ask for a base URL or related compatibility settings.
After saving, use the provider panel’s connection test. A successful test confirms that Dojo can reach the provider and retrieve the information needed for model selection. If the test fails, recheck the account session, key, endpoint address, network connection, quota, and provider status.
Step 4: Choose a model
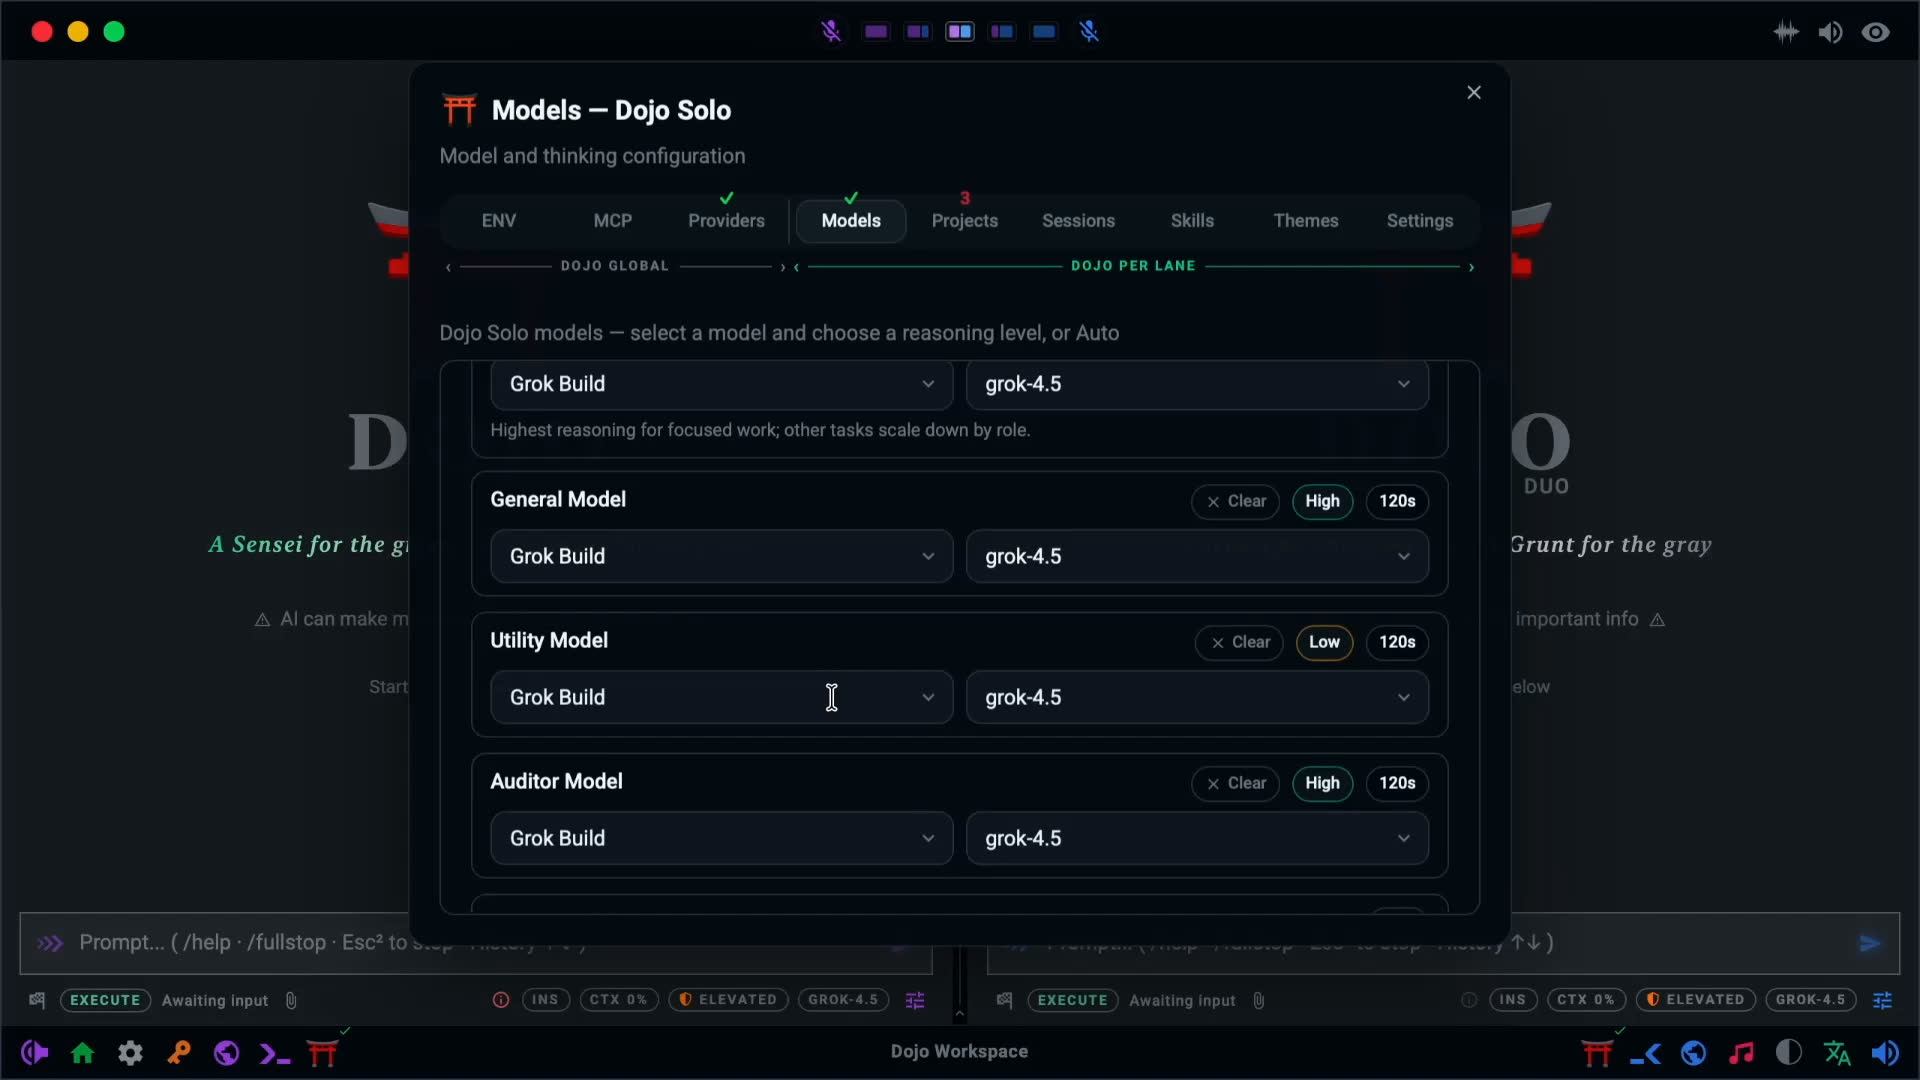
Open the Models section after the provider is connected.
Dojo may automatically choose the best available enabled model when there is no saved project or lane preference. You can keep that choice or explicitly select another model from the connected provider.
Choose based on the work you expect to do:
- a strong reasoning model for architecture, difficult debugging, and broad planning
- a balanced model for everyday coding and general work
- a faster or less expensive model for mechanical checks and routine tasks
You can change the model later. The first choice is not permanent, and different lanes can use different models when that supports the work.
The important setup signal is simple: make sure the model is enabled and active before moving to the project.
Step 5: Add your project folder
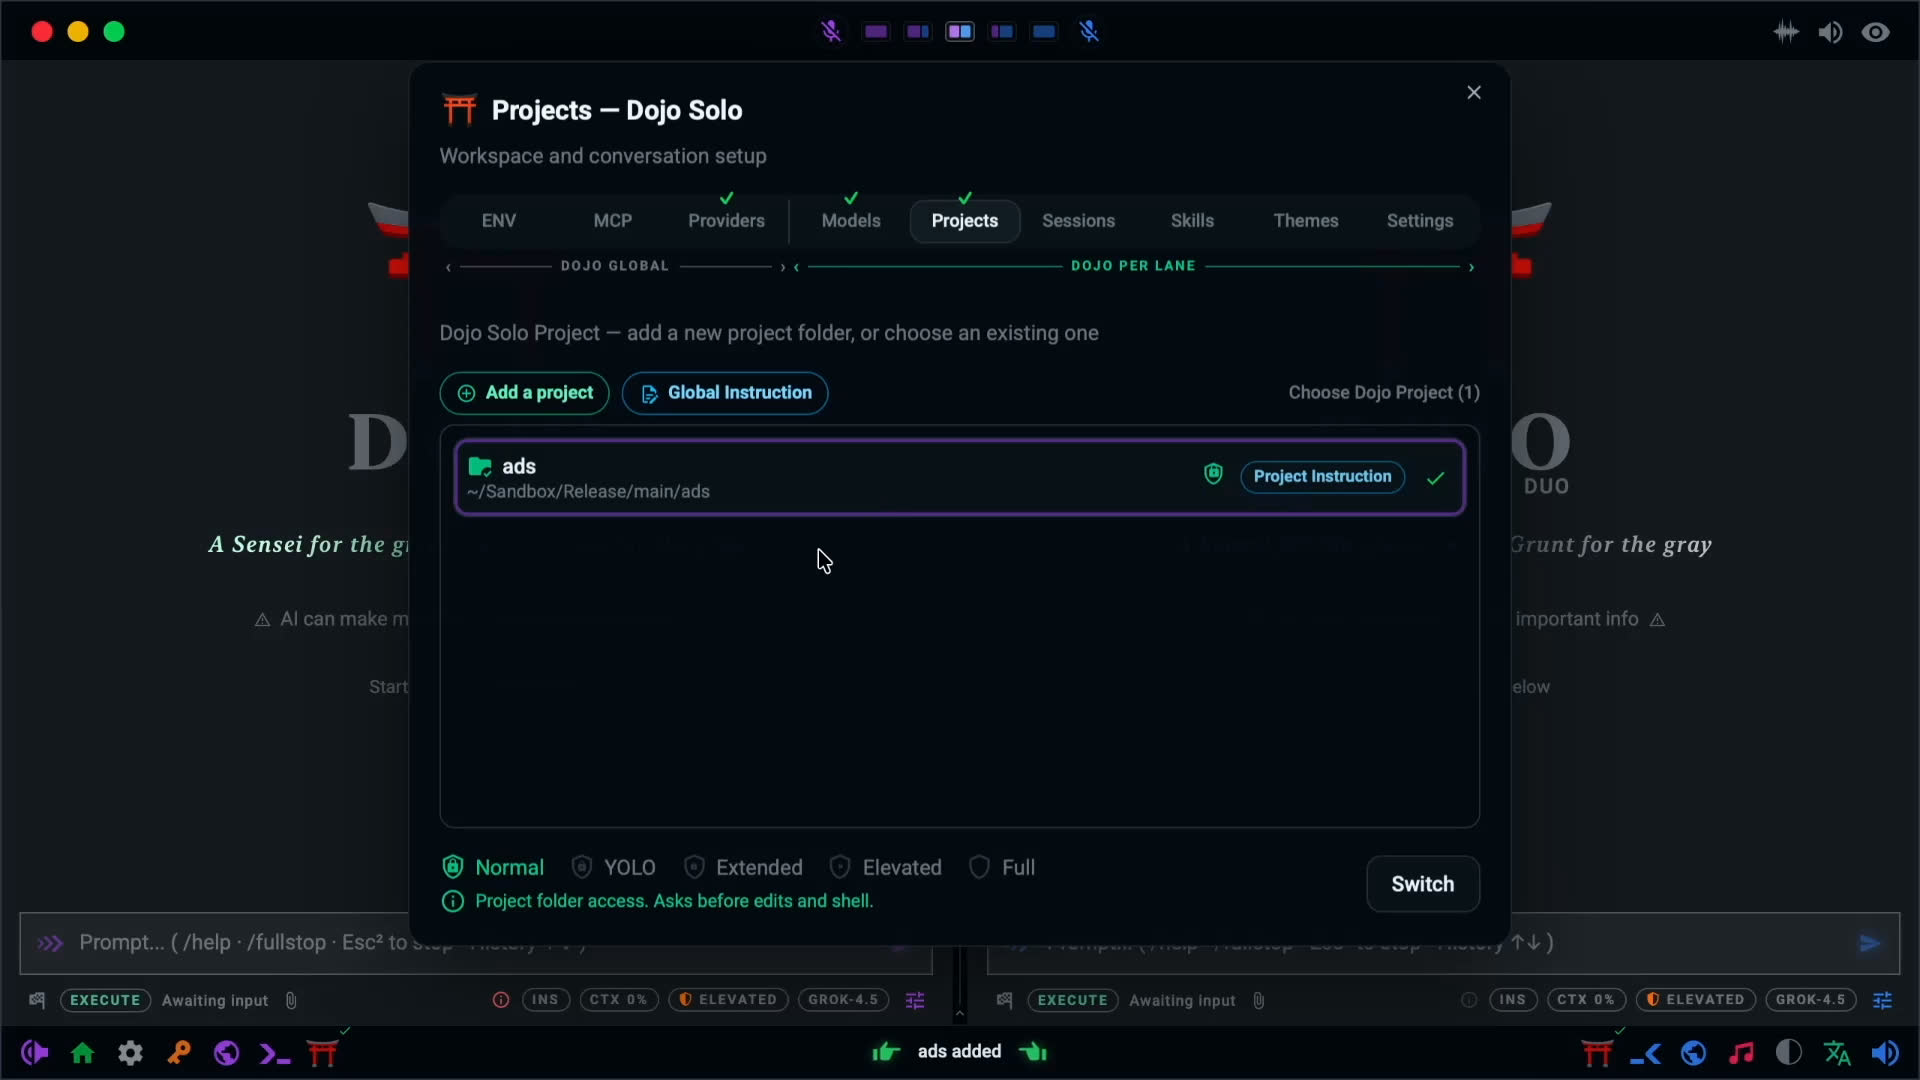
Open Projects, then choose Add a project.
Select the folder where the work lives. This might be a software repository, a marketing project, a research folder, or another working directory. The project tells Dojo where it should read files, create artifacts, run project tools, and apply approved changes.
Choose the narrowest folder that contains the work. Selecting an entire home folder when the task lives in one repository gives the session more scope than it needs.
Once added, choose the project from the list. Dojo remembers project-specific choices so returning to the same work is faster.
Step 6: Choose an access level
Before launching the project, choose how much local access Dojo should have.
Normal
Use Normal when you want conservative project access and confirmation before edits or commands. This is a comfortable first choice while learning how Dojo works.
YOLO
YOLO keeps work inside the active project but removes routine prompts there. It is useful when the project is isolated and you want a faster local workflow.
Extended
Extended adds access to the home folder for work that spans the project and related user files. Sensitive or destructive actions still require care.
Elevated
Elevated broadens local reach to include additional folders and local developer resources. It suits trusted workflows that genuinely cross project boundaries.
Full
Full grants broad local-machine latitude for advanced users and dedicated environments. It does not mean every irreversible, credential-related, database, remote, or publishing action becomes automatic.
Start with the least access that can complete the work. You can change the project’s access level later when the task requires more—or when you want to tighten the boundary again.
Select Launch to activate the project.
Optional: set up voice and audio
Voice is not required to use Dojo. Typing works from the first session.
If you want natural spoken interaction, allow microphone access when macOS asks. You can then choose voices for the primary and secondary lanes, select output devices, and decide whether to use local dictation or an available cloud voice feature.
Local and cloud voice paths have different privacy, quality, provider, and account considerations. Enable only the options you intend to use, and review the relevant settings before sending audio to a cloud service.
If microphone access was denied, reopen System Settings → Privacy & Security → Microphone and enable Dojo Workspace.
Run a first setup check
Setup is complete when four things are true:
- a provider is connected and passes its connection test
- an active model is selected
- a project is launched
- the prompt is ready for input
Use a small, read-only first request to confirm the workspace. For example:
“Inspect this project, explain what it contains, and tell me how to run its tests. Do not change anything.”
That request checks the provider, model, project path, and access boundary without asking Dojo to modify the project.
Once the response matches the folder you selected, you are ready to work normally. You can speak or type, attach files, adjust the model, change access, or add another provider later.
Fix common setup problems
The app will not open
Use macOS Privacy & Security to choose Open Anyway, then relaunch Dojo Workspace.
The provider will not connect
Test the connection again. Reauthenticate an expired account session, re-enter the API key, verify a custom endpoint address, confirm internet access, and check the provider’s quota or service status.
No models appear
Make sure the provider is enabled, refresh its available models, and confirm the connection test succeeds.
The prompt asks for a project
Open Projects, add or select a folder, choose an access level, and press Launch.
The wrong folder is active
Return to Projects and switch to the intended folder before asking Dojo to read or change files.
Voice does not hear you
Confirm microphone permission in macOS and select the intended input device in Dojo’s audio settings.
Dojo needs more access
Return to the project panel and choose the next appropriate access level. Increase scope deliberately rather than selecting broad access by habit.
Ready for the first conversation
Dojo setup is intentionally small:
Connect a provider. Choose a model. Add a project. Set the boundary. Launch.
Everything after that belongs to the work itself.
Start with a clear outcome, let Dojo inspect the project, and adjust providers, models, voice, or access only when the task gives you a reason.